
Article takeaways
- Start by decluttering. Sort items into keep, sell, donate, and discard categories before deciding how to organize what remains.
- Create zones for different types of belongings. Keeping similar items together makes them easier to find and return to the right place.
- Maximize vertical space. Shelving, stackable bins, wall racks, and overhead storage can free up valuable floor space.
- Keep safety and accessibility in mind. Store heavy items low, maintain clear walkways, and keep frequently used belongings within easy reach.
- Maintain your organization system. Regular cleaning, decluttering, and inventory updates can prevent the room from becoming overcrowded again.
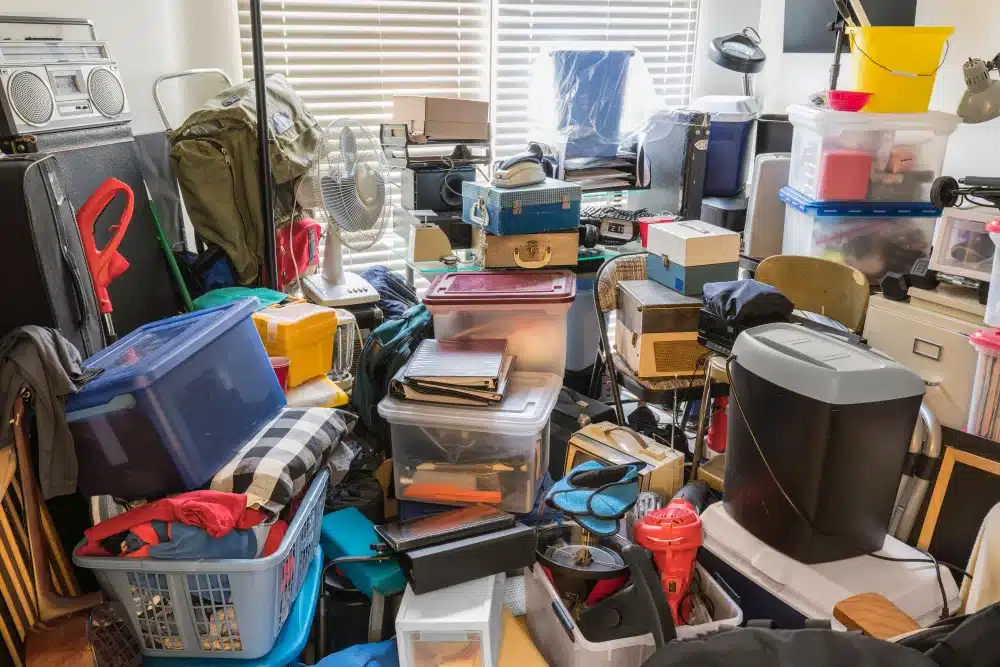
The more we buy to upgrade and replace other items in our lives, the more those old items tend to collect in our storage rooms. Over time, clutter can stack up and turn a useful space into an unmanageable mess. If this describes your storage space, it’s worth taking time to clean and declutter it so you can fit more in the room and find what you need when you need it.
If you’re wondering how to organize storage room clutter that has gotten out of hand, start by assessing the space, clearing out what you no longer need, and creating an organization system for everything that remains.
In this guide, we’ll walk through organizing your storage room from planning and sorting to choosing storage solutions and keeping the space from getting messy again.
Assess and Plan Your Storage Room

Even the most intimidating cleaning jobs are much easier if you plan instead of diving right Even an intimidating organization project is easier when you have a plan instead of diving right in. Start by identifying the biggest problems in your storage room and deciding what you want the space to look like when you’re finished.
1. Evaluate Your Space
Take a thorough look at your storage room and identify the biggest problem areas. Are there items you no longer need? Can you easily move through the room? Can you find what you need without moving multiple boxes?
Identifying these issues gives you a starting point and helps break a larger organization project into manageable tasks.
2. Set Goals and Priorities
Use the problem areas you identified to create a plan. Start with larger goals, such as clearing the floor or making frequently used belongings easier to access, then break those goals into smaller tasks.
Prioritizing the areas that cause the most frustration can also help you see progress sooner.
3. Sketch a Layout
If organization is your top priority, draw a quick sketch of how you want the room to function. Decide where major categories of belongings should go and leave enough room for clear walking paths.
A basic layout can also help you determine where shelving, racks, bins, or other storage solutions will fit before you buy or install them.
Declutter Your Storage Room
Once you have a plan, start sorting through what’s already in the room. Getting rid of items you no longer need gives you more space to organize the belongings you actually want to keep.
4. Sort and Categorize Your Belongings
Go through the items in your storage room and separate them into four categories:
- Keep: Items you need, use regularly, or want to hold onto for sentimental reasons.
- Sell: Items you no longer need that are still usable and have value, such as recent electronics, storage for clothes and shoes, collectibles, or furniture.
- Donate: Useful belongings you no longer want. Clothing can go to shelters or donation centers, while storage for things like appliances, tools, furniture, and household goods is harder to find; they may be accepted by thrift stores or local organizations.
- Discard: Broken or unusable items. Check local recycling and waste-disposal guidelines, particularly for electronics, chemicals, batteries, or other materials that shouldn’t go into regular household trash.
If you haven’t used something in a long time, consider whether it still deserves space in your storage room. If you have belongings you need to keep but simply don’t have enough room for, you can also consider renting a small storage unit to clear out space while you organize.
5. Take It One Area at a Time
You don’t have to empty and organize the entire room at once. Focus on one category, shelf, corner, or group of boxes at a time.
Finding ways to store seasonal items and decor can be a good place to start because they’re easy to group. Archived documents can be sorted and digitized where appropriate, while miscellaneous boxes can be separated into categories before you decide what to keep.
Working through smaller areas one at a time can make a large organization project feel much more manageable..
Choose the Right Storage Solutions

Once you’ve sold, donated, recycled, or discarded what you don’t need, you can focus on how to store and organize everything that remains.
6. Install Shelving
Shelving helps you take advantage of vertical space while keeping boxes and belongings off the floor. Wall-mounted adjustable shelving can provide both sturdiness and flexibility if your storage needs change, while freestanding shelving may work well if you want a less permanent solution.
Before installing shelves, measure the room and consider the size and weight of the items you plan to store on them.
7. Add Racks and Overhead Storage
Wall-mounted racks are useful for storing equipment such as tools and bicycles that might otherwise take up floor space. If your storage room has high ceilings, ceiling-mounted racks or shelves can provide additional storage for lightweight belongings you don’t need to access regularly.
Keep frequently used items within easy reach and reserve higher storage areas for seasonal or occasional-use belongings.
8. Use the Right Boxes and Bins
Choose containers based on what you’re storing rather than using the same type of box for everything.
Documents and other paper goods may need acid-free containers for long-term storage. Delicate or vintage clothing is better suited to garment bags or breathable fabric containers. Durable household belongings can often go into sturdy, stackable plastic bins.
Clear bins make it easier to see what’s inside, while opaque containers can help protect light-sensitive items.
Organize What You’re Keeping

Once you have the right storage solutions, create a system that makes belongings easy to find, access, and put away.
9. Label Boxes and Bins
Label containers clearly so you don’t have to open several boxes to find what you need. Put labels on more than one side when possible so they remain visible even when containers are stacked or placed on shelves.
Be specific. A label such as “Holiday Decorations: Lights and Ornaments” is more useful than simply writing “Holiday.”
10. Organize the Room by Zones
Designate specific areas for different categories. One shelving unit might hold clothing, another could contain household supplies, and a corner might be reserved for sports equipment.
Use the layout you created during the planning stage and keep similar belongings together. Frequently used categories should be easier to access than items you only need once or twice a year.
11. Make a Digital Inventory
Whether you use a document, spreadsheet, or inventory app, keeping a detailed inventory of everything in your storage room can save you from searching through boxes later.
Note what you have and where it’s located. If other members of your household use the storage room, share the inventory so everyone knows where items belong.
Maximize Storage Room Space
Floor space isn’t the only area available for storage. Walls, doors, shelving, and unused vertical space can all help you fit more into the room without sacrificing accessibility.
12. Use Vertical Space
Stackable bins allow you to use the height of the room rather than spreading everything across the floor. Shelving provides additional vertical surfaces while keeping individual containers easier to access than tall stacks of boxes.
Avoid stacking containers so high that they become unstable or difficult to retrieve safely.
13. Use Doors and Walls
Door and wall space can hold smaller items that would otherwise take up shelf or floor space. Over-the-door organizers can hold shoes, accessories, cleaning supplies, or small household items, while pegboards and hooks work well for tools and equipment.
14. Choose Multifunctional Furniture
If the room serves another purpose in addition to storage, choose furniture that provides built-in organization. For example, if you’re using the room for crafts, a worktable with drawers or cabinets can provide both workspace and storage.
Dressers, cabinets, benches, and other furniture with enclosed storage can serve a similar purpose when space is limited.
Maintain an Organized Storage Room
Getting the room organized is only the first step. A simple maintenance routine can prevent clutter from building back up.
15. Schedule Regular Storage Checkups
Every few months, go through the room and make sure belongings are still in their designated zones. Remove items you no longer need and update your inventory when something is added, removed, or relocated.
If your storage room fills quickly, you may want to check it more often.
16. Clean the Room Regularly
Keeping the room clean helps protect both the space and the items inside. As part of your regular storage room cleaning routine:
- Dust shelves and surfaces.
- Sweep or vacuum the floor.
- Check for signs of pests.
- Look for moisture or humidity issues.
- Make sure boxes and bins remain in good condition.
Address leaks, excessive humidity, or temperature concerns before they damage stored belongings.
Keep Safety and Accessibility in Mind

An organized storage room should also be safe and easy to navigate. Whether you’re organizing a room in your home or a self-storage unit, consider how items are stacked, how easily you can reach them, and whether you have enough room to move through the space.
17. Store Heavy Items Low
Keep heavy belongings on lower shelves or the floor. When stacking bins, put heavier containers on the bottom so they don’t crush lighter belongings or make the stack unstable.
Keeping heavy items lower also reduces the need to lift them above your head when putting them away or retrieving them.
18. Maintain Clear Walking Paths
Leave enough room to walk through the storage area and reach the items you need. Avoid placing boxes, extension cords, or other objects in walkways where they can create tripping hazards.
If the room is large enough, creating a center aisle can make belongings on both sides easier to access.
19. Keep Frequently Used Items Within Reach
Store the items you use most often around eye or waist level. Tools, cleaning supplies, household extras, and other frequently accessed belongings shouldn’t require you to move several boxes or climb a ladder every time you need them.
20. Use a Step Stool or Stepladder
If you use high shelves, keep a stable step stool or stepladder nearby. Avoid standing on chairs, boxes, bins, or other surfaces that aren’t designed for climbing.
21. Secure Shelving
Anchor shelving units when appropriate to reduce the risk of tipping. Follow the manufacturer’s installation instructions and make sure shelves are suitable for the weight they’re expected to hold.
Avoid overloading shelves or creating unstable stacks of containers.
Organize a Storage Room on a Budget

You don’t need expensive custom organization systems to create a functional storage room. If you’re working with a limited budget, look for ways to repurpose what you already own before buying new storage products.
22. Build Custom Shelving
If you already have the tools, materials, and experience, building your own shelving can let you customize the dimensions to your room. Measure carefully and make sure the finished shelving can safely support what you plan to store.
23. Repurpose Furniture
Dressers, bookshelves, cabinets, nightstands, and other furniture you already own may be able to serve as storage. Look for pieces with drawers, cabinets, or usable surfaces that can help organize smaller belongings.
24. Shop for Affordable Organizers
Discount stores can be useful for smaller bins, baskets, drawer organizers, labels, hooks, and other inexpensive supplies. Before buying, measure your shelves and available space so you don’t end up with organizers that don’t fit.
25. Reuse Containers You Already Have
Glass jars, sturdy household containers, baskets, and other reusable items can organize smaller belongings without adding to your budget. You can also make labels from paper, cardstock, or other supplies you already have.
Just make sure reused containers are clean, dry, and appropriate for what you plan to store.
When to Consider a Storage Unit
After decluttering and organizing, you may find that you simply have more belongings than your storage room can comfortably hold. Overfilling the room can make items harder to access and undo much of the organization work you just completed.
If you need to free up space at home while keeping belongings you still use or want, you may want to rent a storage unit. A storage unit can be useful for seasonal belongings, furniture, equipment, or other items you don’t need to keep at home year-round.
When you’re ready to start searching, use Storage.com to compare storage facilities near you and find a unit that fits your storage needs.
want to do, you’re in the right place.
Keep reading through the Storage.com blog if you want to find more tips on finding the right unit for your storage needs. When you’re ready to start searching, use our convenient search tool to put in your location and compare storage facilities near you.